
What to Expect When Having a New Washing Machine Installed

Whether you have just ordered a replacement or you are still browsing, knowing what happens during washing machine installation takes the stress out of the entire process. This comprehensive guide walks you through every stage, from preparing your kitchen to running that first test cycle, so there are no surprises on the day.
Key Takeaways
-
This is a practical overview for homeowners in Bedfordshire - covering Luton, Dunstable, St Albans, Milton Keynes and surrounding areas - who are booking installation with Joe Graham & Son Ltd or considering a DIY approach.
-
A standard like-for-like washing machine installation (freestanding, near existing water and waste connections) usually takes around 30 to 60 minutes. Integrated washing machine fitting or jobs that involve extra plumbing can take up to two hours or more.
-
Engineers will disconnect and remove the old washing machine if pre-booked, position and level the new machine, connect the water supply and drain hose to the waste pipe, and run a short test cycle to check for leaks and vibration.
-
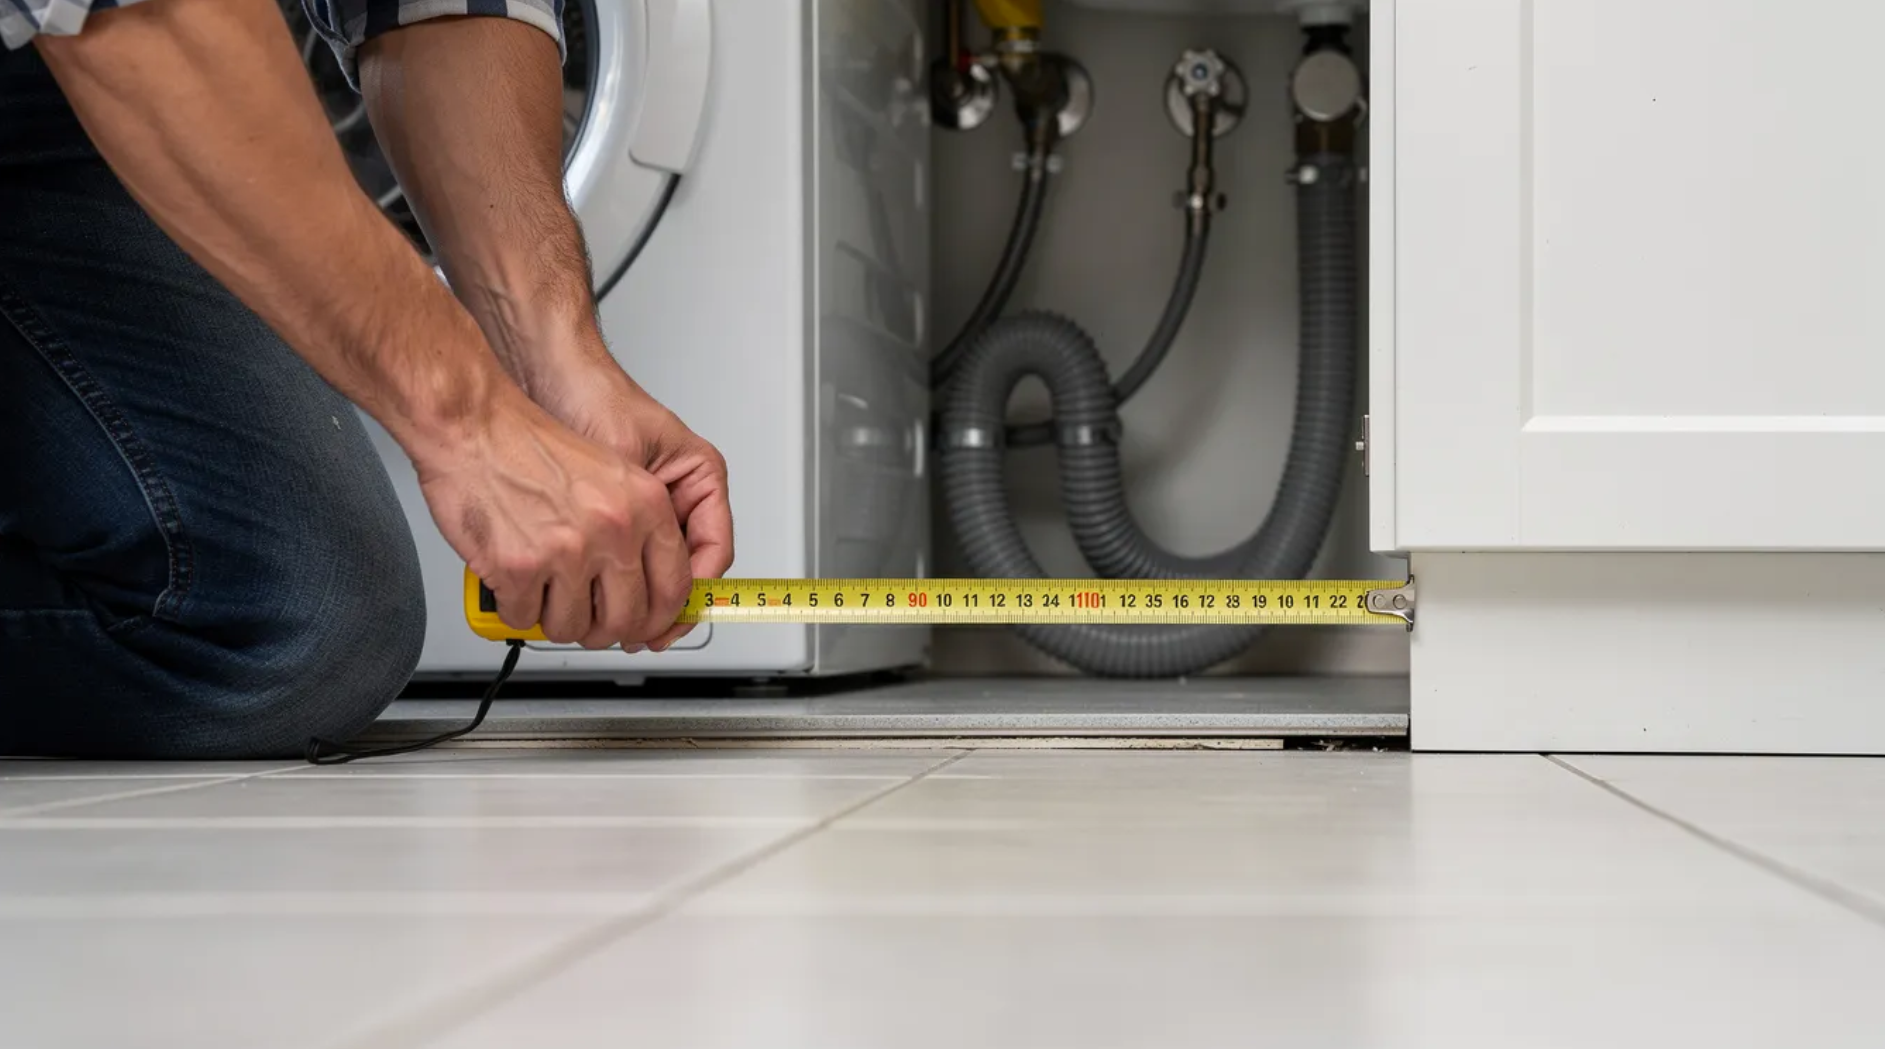
Before delivery day, customers should clear access paths, measure the space, and confirm that water taps, the waste pipe and an accessible electrical socket are all within roughly one metre of the installation location.
-
Joe Graham & Son Ltd can handle tricky jobs - plumbing a washing machine into awkward pipework, reaching hard-to-access waste pipes, and fitting integrated doors - while DIY installation is only advisable for simple, like-for-like swaps where suitable connections are already in place.
1. Before You Book: Deciding Between DIY and Professional Installation
When you are replacing an old washing machine, one of the first decisions is whether to tackle a DIY installation or book a professional service. This choice affects your costs, the time it takes, and the risk of something going wrong.
When DIY installation makes sense:
-
You are doing a like-for-like freestanding replacement in the exact same spot. If replacing an existing machine in the same spot, the process is usually simpler.
-
There is an accessible cold water stop valve, a clear waste pipe, and a nearby socket already in place.
-
You have the right tools - at minimum a spanner, screwdriver and spirit level - and you feel confident following the manufacturer's step by step guide.
When professional installation is the better call:
-
You are moving the new washing machine to a different room or a location without nearby plumbing.
-
The job involves an integrated washing machine behind a cabinet door, which requires carpentry and precise alignment.
-
You need extra water pipes or electrical sockets installed, or your existing valves are old and seized.
In terms of cost, many UK installers charge around £30–£100 for basic freestanding washing machine installation, and £110–£190 for integrated or complex installs. Joe Graham & Son Ltd offers competitive, transparent pricing across all these scenarios.
It is also worth noting that some manufacturers require professional installation for warranty validity, so always check your manual before committing to DIY. For most households, professional fitting saves money in the long run by reducing leak risk and ensuring the old washing machine is taken away the same day.
2. Getting Ready a Few Days Before Delivery
A little planning two to three days before your new washing machine arrives can prevent delays and unexpected costs on installation day.
-
Measure the space. Check the width, height and depth of the gap where the machine will sit. Most washing machines are around 60 cm wide and 85 cm tall, but depths vary. Allow at least 7 cm of extra depth behind the appliance so hoses are not kinked against the wall.
-
Check water supply and waste. Verify that a cold water valve is functional and accessible - the tap should turn freely without seizing or dripping. Confirm there is a waste pipe or standpipe within about one metre of the machine's final position. Check water pressure is suitable before installing the washing machine; unusually low pressure can extend cycle times. Also check that water supply taps work properly before installation.
-
Confirm the electrical socket. Check that there is an appropriate mains socket nearby, ideally within one metre and not behind a cooker or fridge where you cannot reach it.
-
Clear a path from the entrance to the washing-machine location. Move shoes, rugs and any furniture blocking doorways so installers can safely wheel out the old washer and bring in the new appliance.
-
Flats and terraced houses. If you live in a flat or a tight terraced property, check that communal doors, gates and stairwells are unlocked and wide enough for the appliance to pass through on the agreed delivery date.
3. What Happens on Delivery Day
For Joe Graham & Son Ltd customers in Luton and surrounding areas, delivery day typically starts with a morning or afternoon time slot. On arrival, the team will do a quick survey of your kitchen or utility room and confirm the agreed scope - whether that is install only or install plus removal of the old appliance.
-
Model and location check. Installers confirm whether you are having a freestanding or integrated washing machine fitted, note the exact position, and discuss any special instructions such as keeping an existing decorative panel.
-
Old appliance removal. If removal was pre-booked, the team will disconnect the old washing machine - ensuring it is unplugged and accessible - wheel it out on a trolley, and load it for environmentally responsible recycling under current UK WEEE regulations. Disconnecting and removing the old appliance is a standard part of the installation process.
-
Bringing in the new machine. Your new washing machine is brought in carefully, usually still in its packaging, and checked externally for transit damage before unboxing in the room where it will be installed.
-
Be available. Customers should be on-site throughout to answer queries, agree the siting of the new appliance, and sign to confirm successful delivery and installation at the end.
4. Disconnecting and Removing Your Old Washing Machine
Whether your installer handles this or you are doing it yourself, safe disconnection prevents floods and damage to your floor.
-
Standard steps. Switch off the electrical socket and pull the plug. Turn off the cold water isolation valve. Run the machine briefly or open the pump filter to drain residual water, then loosen the inlet hose and drain hose. Prepare a towel and bucket because hoses often contain some leftover water.
-
Floor protection. Installers will lay mats or cloths before dragging the old washing machine out, especially on tiled or laminate surfaces that scratch easily. Washing machines can weigh over 200 pounds, so this is not a one-person job.
-
Responsible disposal. Joe Graham & Son Ltd can take the old washing machine away for recycling if this service has been added at the time of ordering.
-
DIY caution. If you are handling removal yourself, have towels and a shallow tray ready. Do not force seized valves or overtightened connectors - you risk cracking old fittings. Professional installers ensure proper water shut-off to prevent leaks, which is one of the key advantages of booking a service.
5. Unpacking the New Washing Machine and Removing Transit Bolts
Careful unpacking and bolt removal are critical before the machine is ever switched on. Skip this step and you risk serious internal damage.
-
Unboxing. Remove the outer cardboard box, plastic wrap and polystyrene. Remove packaging and inspect the new machine for damage - check the cabinet, door glass and control knobs for dents or cracks before proceeding.
-
What are transit bolts? They are usually three to five large bolts at the back of the new washing machine that lock the drum in place during transport. You must remove up to five transit bolts before installation using a spanner or socket wrench.
-
Caps and storage. Replace each bolt hole with the plastic caps supplied in the accessory bag. Keep the bolts in a labelled bag - you will need them again if you ever move house and transport the machine.
-
What goes wrong if you skip this? Leaving transit bolts in causes excessive vibration, loud banging during spin, and damaged drum bearings. Professional installers always double-check this step, and it is one of the most common mistakes in DIY installation.
6. Positioning, Levelling and Floor Protection
Correct positioning and levelling directly affect noise levels, spin performance and the long-term life of your new washing machine.
-
Rough positioning first. The machine is placed in front of its final position so that hoses and the power cable can be connected without strain. Once everything is hooked up, it is slid back into its gap.
-
Use a spirit level. Place it on top of the machine, front-to-back and side-to-side. The installer often levels the machine by adjusting the feet during installation - screw them in or out until the bubble is centred. Lock nuts (found on many brands) are then tightened to secure each foot.
-
Stability check. Installers gently rock the washer at each corner. If it moves or rattles, more adjustment is made. Ensure your washing machine is level to prevent vibrations, noise and premature wear. Utilize a clean, dry floor for the installation; ensure the area is clean and dry before proceeding.
-
Integrated units. For an integrated washing machine, levelling must be done while also lining up the appliance with neighbouring cabinets and plinths so that the door lines are straight. Manufacturers like Samsung recommend at least 25 mm clearance at the top and sides and 50 mm at the rear.
7. Connecting the Water Supply Safely
This section covers plumbing a washing machine to the cold water supply. Most modern UK appliances - including most washing machines - only require a single cold fill hose, so there is no need for a hot water connection.
-
Attach the hose. Connect the right-hand water inlet hose to the rear connector on the washing machine by hand, then screw the other end onto the mains cold water tap or isolation valve under the sink or beside the appliance. Connect the cold-water inlet hose to the existing cold-water tap and check for leaks.
-
Washers and tightening. Use the supplied rubber washers inside each coupling. Hand-tighten first, then give a gentle nip with a spanner - overtightening risks cross-threading or cracking plastic fittings.
-
Flush and inspect. Installers will briefly open the tap before full connection to flush any debris from the pipe, then turn it fully on and inspect around the connection point for drips.
-
Pressure and pipework. Check water pressure before installing your washing machine. Customers with unusually low water pressure, shared feeds or very old water pipes should mention this when booking, as water supply problems can arise from blockages or damaged pipes and may need a plumber's input.
8. Attaching the Drain Hose to the Waste Pipe
Correct drain hose installation prevents overflows, siphoning and foul odours. Engineers will test drainage as part of commissioning.
-
Two common UK setups. The drain hose either hooks into a standpipe with a U-shaped hose guide, or connects to a sink waste spigot under the kitchen sink. Connect the drain hose to an existing standpipe or suitable waste connection, whichever your kitchen uses.
-
Height matters. The open end of the drain hose should sit between about 60 cm and 100 cm off the floor, following manufacturer instructions. Too low invites siphoning; too high and the pump may struggle. Improper drainage can cause washing machine siphoning issues.
-
Secure and inspect. Installers will secure the hose with clips or ties so it cannot jump out during a high-speed spin, and they will check the waste pipe itself for obvious kinks, blockages or leaks. Inspect the drainpipe for blockages before connecting. Check that the waste outlet is clear before the washing machine installation begins.
-
DIY tip. If you are swapping from an old washing machine on a shared waste pipe (for example, one that also serves a dishwasher), have a bucket handy and some basic plumbing know-how. Incorrect setup can cause slow draining or water backing up into the sink.
9. Electrical Connection and First Power-On
Most UK washing machines are supplied with a standard 13A plug and should be connected directly to a wall socket - never an extension lead or multi-way adapter.
-
Socket check. Installers will visually check the socket position (typically within one metre of the appliance), confirm it is not cracked or loose, and then plug in the washing machine once plumbing is completed. Ensure a standard, grounded wall socket is nearby without relying on an extension lead.
-
Fused spurs. For some integrated washing machine setups, the appliance may be wired into a fused spur by a qualified electrician, especially in older kitchens where electricity runs through fixed wiring rather than accessible plug sockets.
-
Initial setup. Once powered, the installer will set language and basic options on the display (if applicable), confirm the door locks correctly, and check that the control panel and control knobs respond as expected.
-
Safety warning. Never attempt to rewire a plug or alter fixed wiring yourself. Electrical issues may occur if water leaks onto electrics, creating a serious hazard. Contact a competent electrician or the Joe Graham & Son Ltd service team if anything looks wrong.
10. Final Checks, Test Cycle and Handover
A professional washing machine installation should always finish with a test run and a walkthrough of key features with you, the customer.
-
Test cycle. Run a short empty cycle if recommended by the manufacturer before normal use. Installers typically select a rinse or quick wash with the drum empty to check for leaks at the water inlet, drain hose and waste pipe connection while the machine fills and pumps out. Perform a test run to check for leaks and proper operation before final positioning. A useful trick is to test for leaks by running a short cycle with tissue placed around hoses - any dampness shows up immediately.
-
Spin check. During spin, engineers listen for unusual knocking or harsh vibration that could indicate remaining transit bolts, poor levelling or other issues inside the drum.
-
Final positioning. Once testing is complete, the installer will push the new washing machine fully into its final position, re-fit any plinths or trim for integrated units, and tidy packaging for removal where this service is included.
-
Handover. Expect a brief walkthrough covering basic controls, loading tips, energy-saving advice (full loads, lower temperatures, eco programmes), where to find the manual, and how to contact Joe Graham & Son Ltd if any issues appear in the first few washes. You should also know where to find spare parts and repair support through Spares and Repairs if anything needs attention later.
11. Extra Considerations for Integrated Washing Machines
Integrated washing machines, hidden behind a cupboard door, require more time and precision than freestanding models. While a standard freestanding swap takes 45–60 minutes, integrated installs typically run to one-and-a-half to two-and-a-half hours.
-
Door and plinth removal. Installers first remove the existing cabinet door and plinth, then slide the integrated washing machine into the housing while maintaining clearance for hinges, pipes and the waste pipe.
-
Door alignment. This involves fixing brackets to the appliance, adjusting hinge positions and checking that the door sits flush with neighbouring units and opens freely without catching. Even a millimetre out can look wrong on a brand new kitchen.
-
Hidden hazards. Leaks and vibration can be harder to notice on integrated units because the machine is enclosed. Professional fitting and careful levelling are especially important for long-term reliability.
-
Carpentry heads-up. Installers cannot normally modify or cut down worktops and carcasses on the day. If your new washing machine differs in height or depth from the old one, arrange any major carpentry in advance. If you are still choosing a suitable model, browsing the integrated washing machines range at Joe Graham & Son Ltd will help you match dimensions to your existing housing.
12. Aftercare, Common Issues and When to Call for Help
Even after a correct installation, it pays to keep an eye on the new machine during its first week and know when to seek support.
-
Check for damp. After the first few cycles, look behind or under the washing machine for any signs of drips. Tighten hose connections slightly if the installer or manual instructs you to. Leaking can occur due to improper installation, so catching drips early prevents bigger problems.
-
Typical early issues. Minor vibration on certain spin speeds is normal while the machine settles. Gurgling from the waste pipe usually indicates air in the system and tends to resolve itself. A faint rubber smell from new components is common and fades after a few washes. Excessive vibration may indicate an unbalanced load rather than a fault - redistribute the clothes and try again.
-
Register your warranty. Register the new washing machine warranty promptly with the manufacturer (most require this within 14–30 days) and keep your purchase receipt from Joe Graham & Son Ltd in a safe place.
-
Get in touch. If you notice a serious leak, any electrical fault, or anything that feels unsafe - such as water near the plug or a burning smell - shut off the water supply and power immediately. Customers in Luton, Dunstable, St Albans, Milton Keynes and nearby areas can contact Joe Graham & Son Ltd for repair, spare parts, or to browse the full range of laundry appliances on the company website. Whether you need a replacement part for a broken component, advice on a washer dryer, or want to fix an issue with your tumble dryer, the team is here to help.
Frequently Asked Questions
How long does a typical washing machine installation take?
A straightforward freestanding washing machine installation in the same position as the old washer normally takes around 45–60 minutes, including connecting the water supply, attaching the drain hose and running a test cycle. Integrated washing machines or jobs requiring extra plumbing can take up to two hours or longer, depending on the complexity of the door, plinth and pipework involved.
Do I need to be at home during washing machine installation?
Yes. An adult needs to be present to give access, confirm where the new washing machine should go, approve any minor changes on the day, and sign off the job once installation and testing are complete. This also gives you the chance to ask questions about loading, programmes and energy-saving settings.
Can my new washing machine share a waste pipe with a dishwasher?
Many UK kitchens use a double spigot or an appropriately sized waste pipe to serve both a washing machine and a dishwasher. However, the connections must be fitted correctly to avoid backflow. Ask your installer or a qualified plumber to assess your specific setup before assuming the existing arrangement will work with the new appliance.
Is it safe to install a washing machine in a garage or unheated outhouse?
Most manufacturers advise against installing washing machines in unheated spaces. Winter temperatures in Bedfordshire can fall below freezing, and the water inside hoses and valves can freeze and split, leading to leaks and potentially voiding your warranty. Always check the user manual before planning this type of install, and consider relocating the machine indoors or providing frost protection if an outdoor room is your only option.
What should I do if I notice a small leak after the installers have left?
Turn off the water supply valve feeding the washing machine and unplug the appliance from the mains if it is safe to reach the socket. Mop up any standing water, then contact your installation supplier - or Joe Graham & Son Ltd directly - with details of where the leak is appearing. Do not force-tighten connections yourself, as this can make the problem worse.
About the Author


Ceramic vs Induction Hob: What's Best Compared to Gas
December 7, 2022

Signs Your Fridge Freezer Isn't Running As It Should
March 15, 2019

History of the Dyson Company
May 30, 2015



Ceramic Hob vs Induction Hob: What Is the Difference?
October 2, 2026

Top Freestanding Washing Machines in Luton for Every Budget
October 2, 2026

Gas vs Electric Cookers: Which Is Best for Your Kitchen Upgrade?
October 2, 2026
What to Expect When Having a New Washing Machine Installed
August 19, 2026

Is an American-Style Fridge Freezer Right for Your Kitchen?
August 19, 2026
